
Wood Stain Color Chart
The same can of stain can look honey-gold on pine, rich brown on oak and barely there on maple. This interactive chart shows common stain colours on ten popular woods side by side, taking into account how readily each species absorbs stain, so you can narrow down choices before you test. Pick a wood and a stain, adjust the number of coats, and compare.
- Free to use
- No sign-up
- Runs in your browser
Wood stain colour preview
This stain on every wood
Every stain on this wood
Colours on screen are approximations and vary with your display. Stain results depend on the board, sanding, conditioner and application. Always test on a scrap of the same wood.
Wood Stain Test Kit Printables
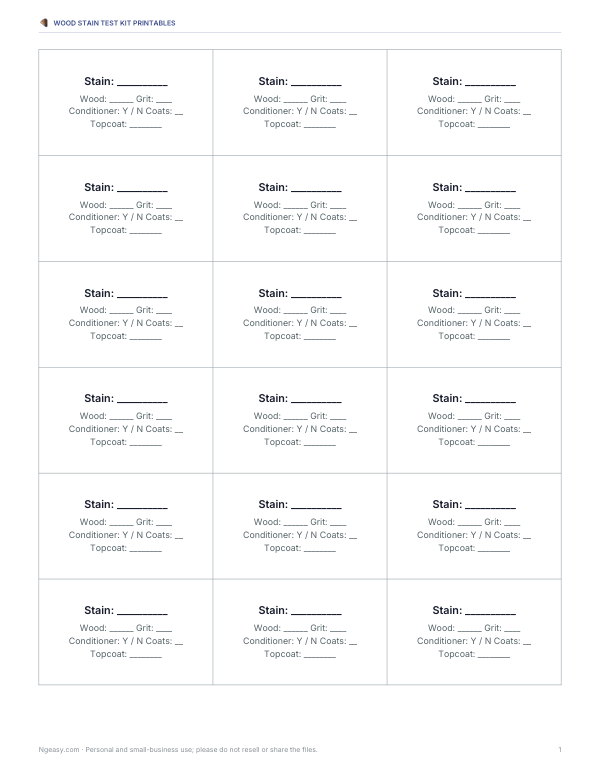
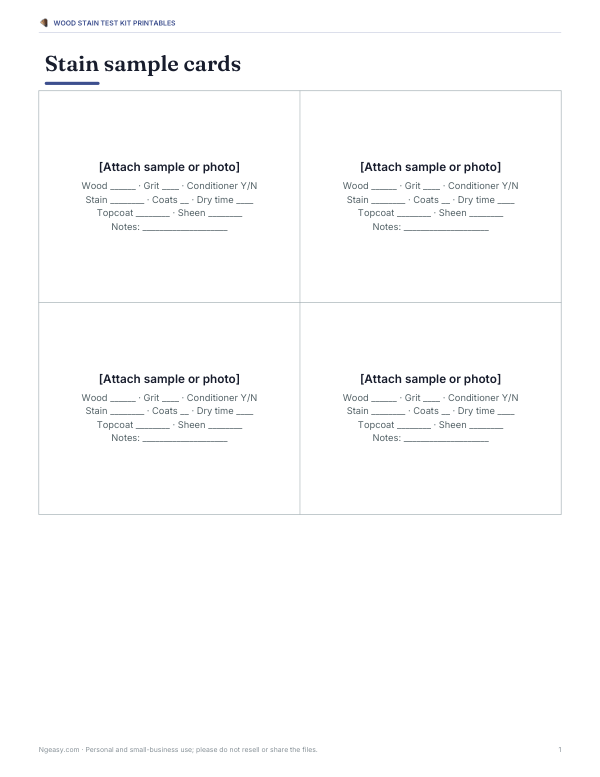
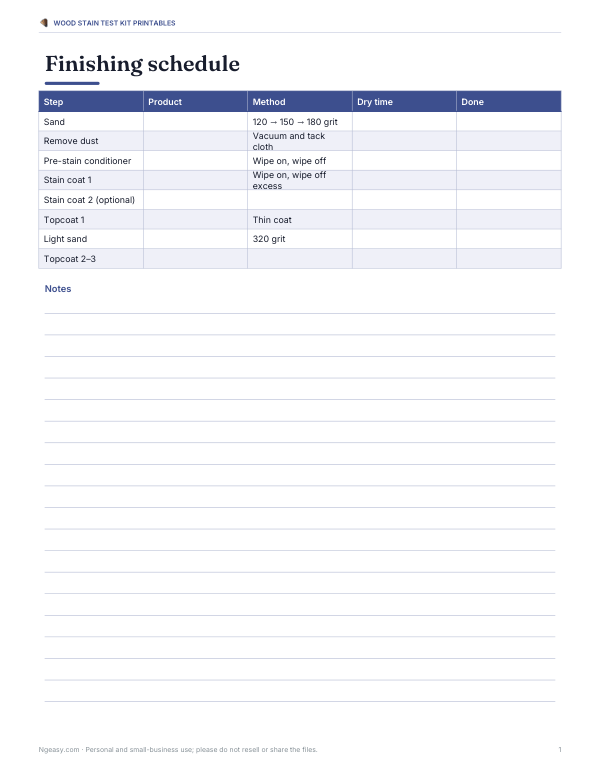
Printable stain test-board labels, a sample card template to record each test, a finishing schedule and a project finishing log.
- Test-board labels (PDF)
- Sample cards (PDF)
- Finishing schedule (PDF/XLSX)
- Finishing log (PDF/DOCX/XLSX)
Formats: PDF, XLSX, DOCX. Instant download after payment (link valid 72 hours, up to 5 downloads). AI-assisted: the templates were drafted with AI help and reviewed and laid out before publishing.
$3.00 USD, one-time 4 files · about $0.75 each
- Instant download
- 7-day refund
- Secure checkout by Stripe
7-day money-back guarantee. Full refund within 7 days of purchase, even after you download.
Free sample: Finishing Log (PDF, 66 KB)
Full refund within 7 days — see the refund policy and license.
Free printables
Single sheets you can print right now, no sign-up. The full pack adds every sheet in one download plus the editable files.
 Printable Wood Finishing Log
Why the same stain looks different on each wood
Stain is a pigment or dye carried in a liquid that soaks into the surface of the wood. How much soaks in depends on the wood’s density and structure: open-grained oak drinks stain into its pores, soft pine absorbs it unevenly, and dense maple and birch resist it. The wood’s own colour shows through too — the same brown stain looks warm on cherry, neutral on oak and almost invisible on walnut. That is why stain cans show colours on one species only, usually pine or oak.
How popular woods take stain
| Wood | Natural colour | Takes stain | Tip |
|---|---|---|---|
| Pine | Pale yellow | Unevenly — can blotch | Use a pre-stain wood conditioner or a gel stain |
| Red oak | Light pinkish-brown | Very well; pores darken | Great for dramatic grain |
| White oak | Light tan | Well and evenly | Popular for modern and rustic looks |
| Maple | Creamy white | Lightly; blotch-prone | Consider dye stains or toners |
| Cherry | Pinkish, darkens with age | Moderately; can blotch | Often left natural to age |
| Walnut | Dark chocolate | Little visible change | Usually oiled rather than stained |
| Birch | Pale | Lightly; blotch-prone | Condition first |
| Poplar | Cream with green streaks | Unevenly | Better painted, or use darker stains |
| Mahogany | Reddish-brown | Evenly | Grain filler for a glass-smooth finish |
| Cedar | Reddish with light streaks | Well | Often used outdoors with exterior stains |
Using the preview
- Choose a wood and a stain; the large panel shows a board with grain.
- Change the number of coats — each extra coat deepens the colour, especially on absorbent woods.
- Add a topcoat: oil-based finishes add a slight amber tone; water-based clear coats stay closer to the stain colour.
- Compare the stain across all woods, or all stains on your wood, in the grids below; click any swatch to open it.
- Shortlist two or three colours to test on real scrap wood.
Always test on scrap
No screen can show exactly how a stain will look on your board. Take an offcut of the same wood, sand it to the same grit as your project (often 150–180 for stain), and test each shortlisted colour with the same number of coats and the same topcoat. Let it dry fully — stains often look different wet and dry — and look at it in the room where the piece will live.
Worked example: choosing for a pine table
You want a warm mid-brown on a pine tabletop. In the preview, medium walnut on pine looks darker in the softer earlywood and a little blotchy, while golden oak looks lighter and more even. On scrap pine, you would test both, with and without a pre-stain conditioner, and one coat versus two. If the walnut looks patchy even with conditioner, a gel stain in a similar colour usually gives a more even result on pine.
Preparing wood for an even stain
- Sand evenly with the grain, finishing at 150–180 grit for most stains; finer sanding can make wood take less stain.
- Remove all dust with a vacuum and a slightly damp or tack cloth.
- Fill holes with a stainable filler, and test it — fillers often stain differently.
- Glue squeeze-out blocks stain completely; scrape and sand it away before staining.
- Stir, don’t shake, stain so the pigment is evenly mixed.
Common problems and fixes
| Problem | Likely cause | Fix |
|---|---|---|
| Blotchy patches | Uneven absorption (pine, maple, cherry, birch) | Conditioner, gel stain or dye; sand back and retry |
| Too dark | Too many coats or left on too long | Wipe with mineral spirits soon after; lighter stain next time |
| Too light | Dense wood or over-sanded surface | Second coat, or sand to a coarser grit |
| Sticky finish | Excess stain not wiped off | Wipe with a rag dampened with the right solvent |
| Raised grain | Water-based stain | Pre-wet, dry and sand lightly before staining |
Stain types
| Type | Characteristics |
|---|---|
| Oil-based penetrating stain | Slow drying, easy to wipe evenly, the most common |
| Water-based stain | Fast drying, low odour, can raise the grain — pre-wet and sand |
| Gel stain | Thick, sits more on the surface; good for blotch-prone woods and vertical surfaces |
| Dye stain | Very fine colour, clear and vivid; good on maple and cherry |
| Stain and finish in one | Convenient, but harder to control depth |
Printable test-board kit
The optional pack includes printable stain test-board labels, a sample card template to record wood, sanding grit, conditioner, stain, coats and topcoat, a finishing schedule sheet and a project finishing log. The preview above is free.
AI-assisted content
This page was drafted with AI assistance and reviewed before publishing. Stain colour names are generic descriptions, not specific brand colours, and on-screen colours are illustrations.
Frequently asked questions
Why does stain look different on my wood?
Each species absorbs stain differently and has its own base colour.
What is the best wood for staining?
Oak takes stain very well and evenly; maple and pine need extra care.
How do I stop pine from blotching?
Use a pre-stain conditioner or a gel stain, and test first.
Does a second coat make stain darker?
Usually, especially on absorbent woods; wipe off excess each time.
Are the colours on screen accurate?
They are approximations; always test on scrap wood.
Does a clear coat change the colour?
Oil-based finishes add a slight amber tone; water-based clear coats change it less.
How long should stain dry before a topcoat?
Follow the can; oil-based stains often need several hours to overnight.